
GST Registration Online
Get Free Consultation
GST Registration Online
- Swift GST Registration in Just 2 Business Days
- Simplified online registration process and status tracking for new user
- Safeguarding your data privacy and security throughout the process.
- Customized solutions for private entities, government entities and individuals
- Timely reminders and automated alerts for your GST filing deadlines and compliance updates.
- A dedicated support team is available to assist with all your GST needs.
- Get Started with Us Today!
A Comprehensive Guide to Online GST Registration
The Goods and Services Tax (GST) is a significant reform in India’s taxation system, simplifying the process of tax collection and enhancing transparency. For businesses operating in India, understanding GST registration is crucial for compliance and efficiency. This guide will walk you through the importance, process, and benefits of online GST registration.
What is GST?
GST is a single tax applied to the supply of goods and services, encompassing all stages of production and distribution. It replaces multiple indirect taxes such as VAT, service tax, and excise duty. Implemented on July 1, 2017, GST aims to streamline the tax structure and create a unified market.
Key Features of GST
- Destination-Based Taxation: GST is levied at the point of consumption, meaning the tax is collected in the state where the goods or services are consumed, rather than where they are produced.
- Input Tax Credit: Businesses can claim credit for the tax paid on inputs, reducing the overall tax burden.
- Unified Tax Structure: GST has replaced several indirect taxes, simplifying the compliance process for businesses.
Who Needs to Register for GST?
Not every business needs to register for GST. The following entities are required to obtain GST registration:
- Businesses with Aggregate Turnover: If your annual turnover exceeds the prescribed threshold limit (currently ₹20 lakhs for most states and ₹10 lakhs for special category states), registration is mandatory.
- Inter-State Supply: Businesses supplying goods or services across state lines must register, regardless of turnover.
- E-commerce Operators: Any entity involved in e-commerce must register for GST.
- Casual Taxable Persons: Businesses that occasionally provide goods or services in a state where they are not registered must obtain a GST registration.
- Non-Resident Taxable Persons: Foreign entities supplying goods or services in India need to register under GST.
Steps for Online GST Registration
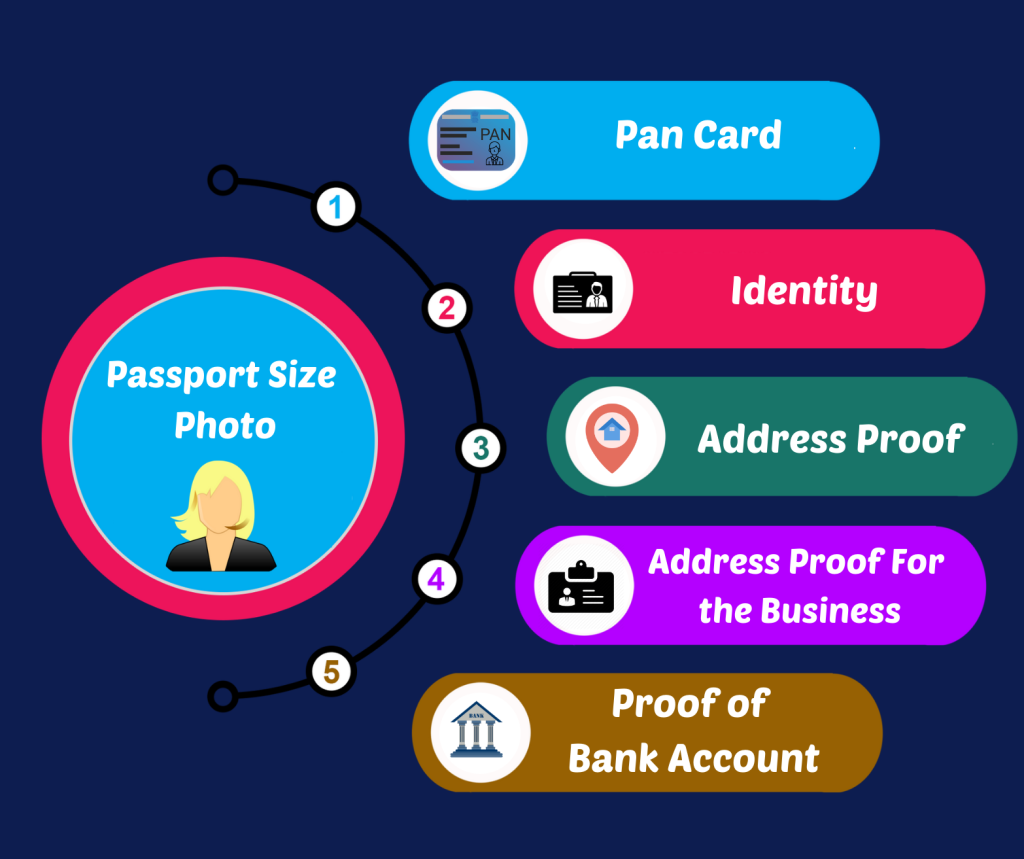
Step 1: Prepare Required Documents
Before starting the online registration process, gather the necessary documents, which typically include:
- PAN Card: The Permanent Account Number (PAN) of the business entity.
- Proof of Business Registration: This could be a certificate of incorporation, partnership deed, or any other relevant document.
- Identity and Address Proof: Aadhar card, voter ID, or any government-issued ID of the authorized signatory.
- Business Address Proof: This could be a utility bill, rental agreement, or property tax receipt.
- Bank Account Statement: A cancelled cheque or a bank statement to verify the business bank account.
Step 2: Visit the GST Portal
Go to the official GST portal: www.gst.gov.in. On the homepage, navigate to the ‘Services’ tab.
Step 3: Select the GST Registration Option
Under the ‘Services’ menu, select ‘Registration’ and then click on ‘New Registration.’ You’ll be directed to a page where you need to fill in your details.
Step 4: Fill in the Application Form (Part A)
In Part A of the registration form, provide the following details:
- State and District: Select the state and district of your business.
- Legal Name: Enter the legal name of your business as per the PAN.
- PAN Number: Enter your PAN.
- Email Address and Mobile Number: Ensure the details provided are valid as they will receive OTPs for verification.
After entering the details, click on ‘Proceed.’ You will receive an OTP on your mobile number and email address. Enter the OTP for verification.
Step 5: Receive TRN (Temporary Reference Number)
Upon successful verification, you will receive a Temporary Reference Number (TRN) via SMS and email. This number is essential for future logins to complete the registration process.
Step 6: Complete Application Form (Part B)
- Login Using TRN: Return to the GST portal and log in using your TRN.
- Complete Part B: Fill in the additional details required in Part B of the application form. This includes:
- Business details
- Bank account details
- Nature of business activities
- Address of the business premises
Step 7: Upload Documents
Upload the required documents in the specified format. Ensure that the documents are clear and legible to avoid rejections.
Step 8: Submit the Application
Once all details are filled in and documents uploaded, review the application for accuracy. After confirming that everything is correct, submit the application.
Step 9: ARN (Application Reference Number)
After submission, you will receive an Application Reference Number (ARN). This number can be used to track the status of your GST registration application.
Step 10: GST Registration Certificate
Once your application is processed, you will receive a GST registration certificate via email. This certificate is essential for conducting business legally under GST.
At AK Tax Consultancy, we specialize in providing personalized and professional tax services tailored to meet the unique needs of individuals and businesses. With years of experience in the tax industry.
- © 2024 AK Tax Consultancy. All Rights Reserved.